Our Ebikes
Info & Instructions
Here, you'll find everything you need to know about the ebike model we offer, including key features, specs, and step-by-step instructions for a smooth and enjoyable ride to Snow Canyon. We currently offer two ebike rental models:
Low
Step
Tour
Made for easy access and all-day adventures, our Low Step Tour model features an ultra-low frame that makes mounting and dismounting effortless.
Please note, this model can accommodate older passengers who may want to ride but not drive!
Low
Step
Tour
Made for easy access and all-day adventures, our Low Step Tour model features an ultra-low frame that makes mounting and dismounting effortless.
Please note, this model can accommodate older passengers who may want to ride but not drive!
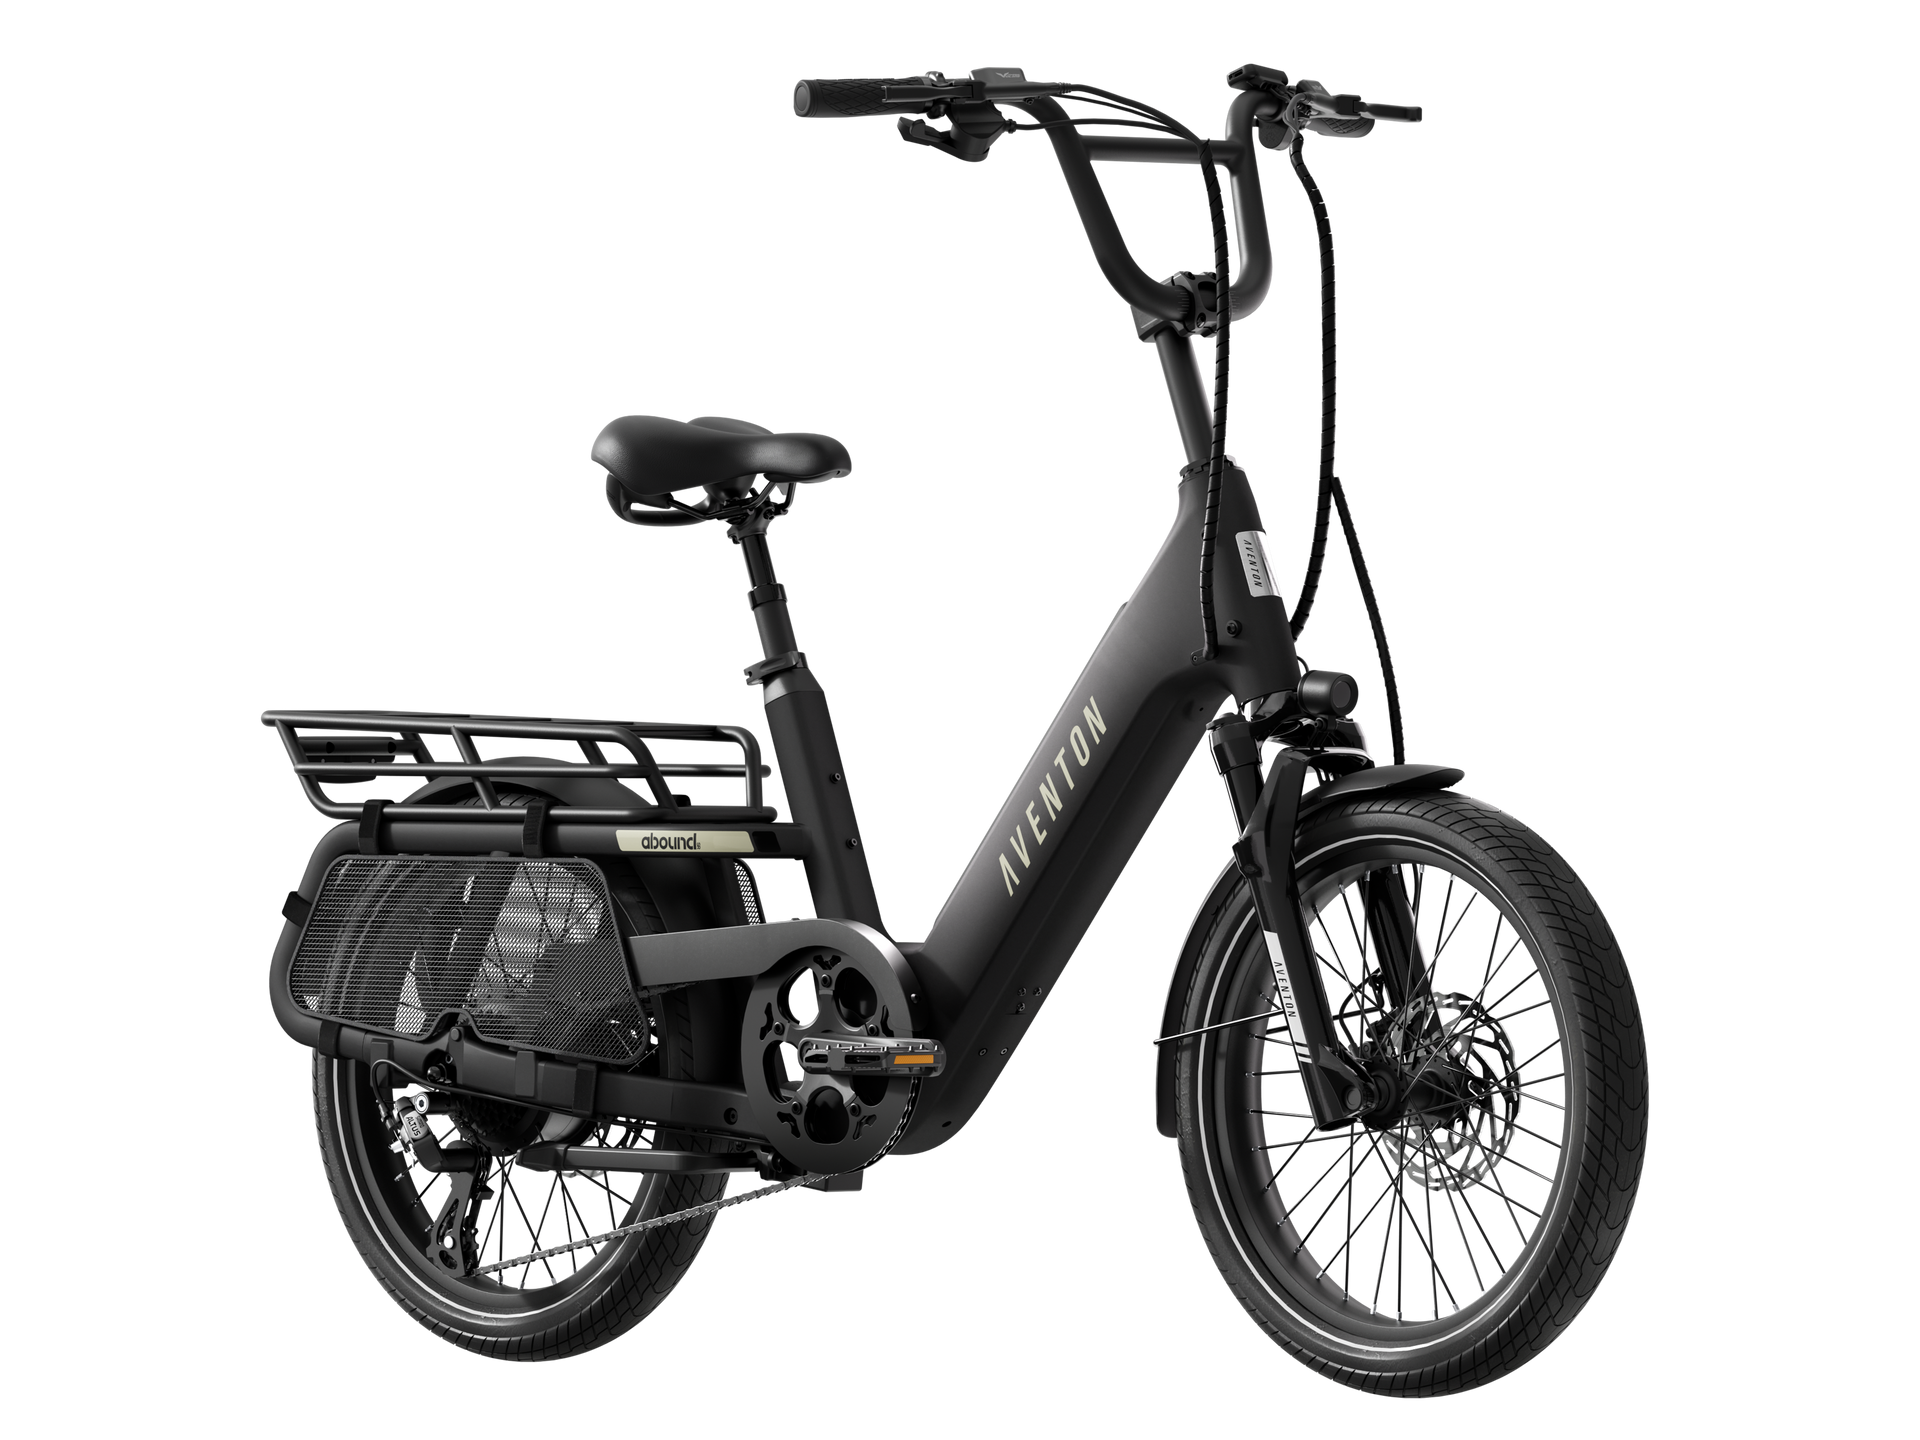
Low Step Tour
Features
- Up to 50 Miles per Charge
- Three-Level Pedal Assist
- Thumb Throttle
- Detailed Control Display
- Eight-Speed Drivetrain
- Low-Step Frame
- Turn Signals
Specs
- Weight Limit: 440 lbs
- Recommended Height: 4'11 - 6'3 (minimum 24-inch inseam)
- Top Speed: 20 mph
Compatible Add-Ons
While this bike is compatible with the Child Seat. keep in mind that the Low Step Tour comes equipped with a rear seat and pegs to accommodate passengers (without an add-on seat). The child seat is intended for smaller children that need to be fastened in with a harness.
FAQ
Does this bike's battery have enough power to do the Snow Canyon Loop? Yes! Almost all of our riders do the Snow Canyon Loop and return with plenty of battery power left!
What if I am outside of this bike's recommended height range? The height ranges specified for our bikes are recommendations from the manufacturers, but we know that our bikes cannot possibly fit everyone.
Feel welcome to rent our ebikes, even if you're outside of our bikes' height ranges. Just know that riding safely is still your responsibility. Overextending a seat post is extremely dangerous and can permanently and irreparably damage a bike. If a bike is returned and we see that the seat has been overextended, we will charge a fee.
Low Step Tour Instructions

Power Button
Push and hold to turn bike on. The display will illuminate and indicate bike is ready to use. Hold again to turn bike off.
Tip: Always turn bike off when finished riding to preserve battery life and prevent accidental activation.
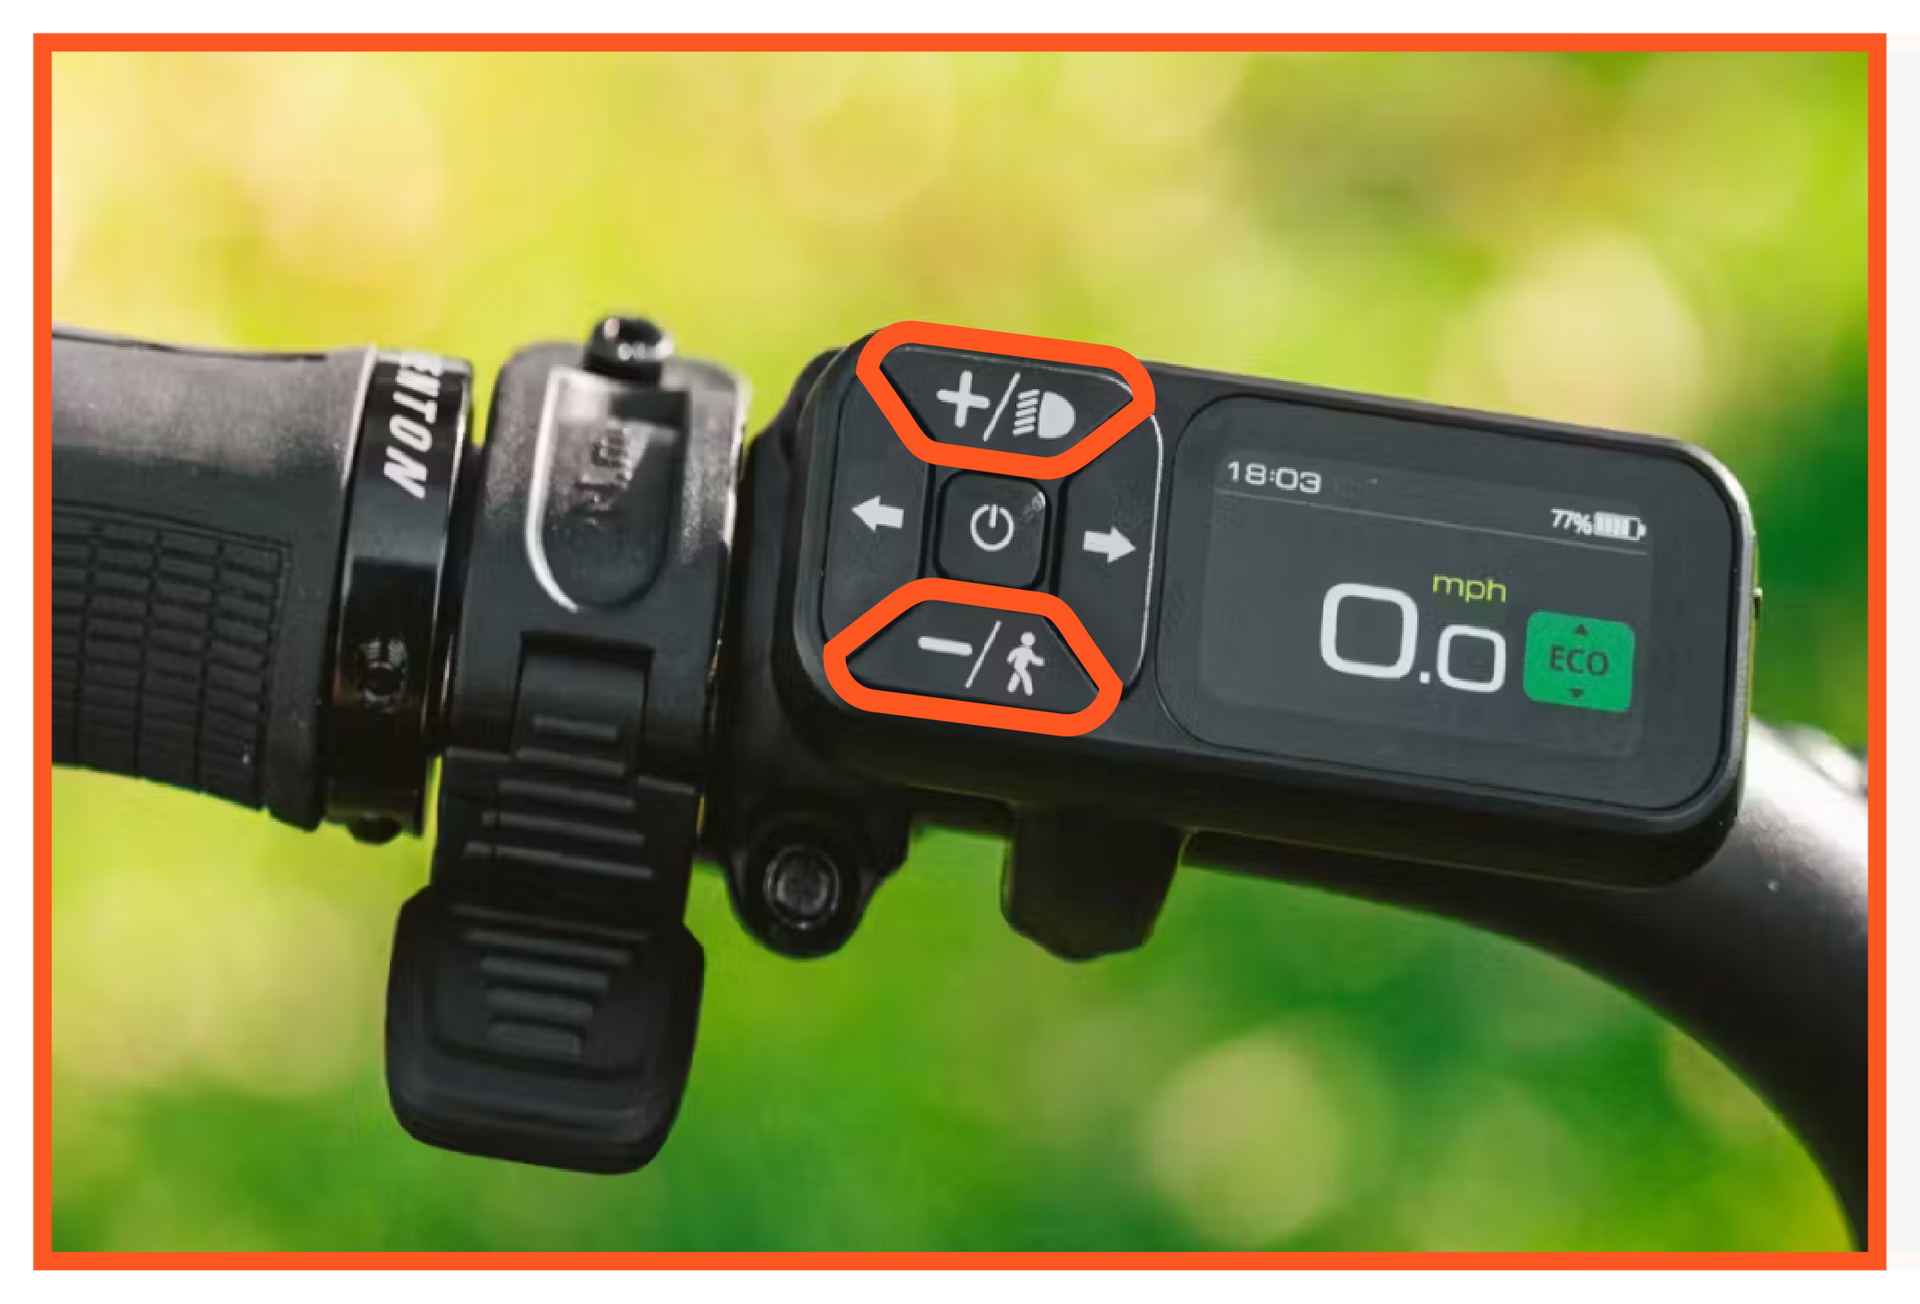
Electric Assist
Push to increase/decrease electric assistance. There are three assist levels: Eco → Sport → Turbo.
Tip: Hold the + button to turn on the headlight.
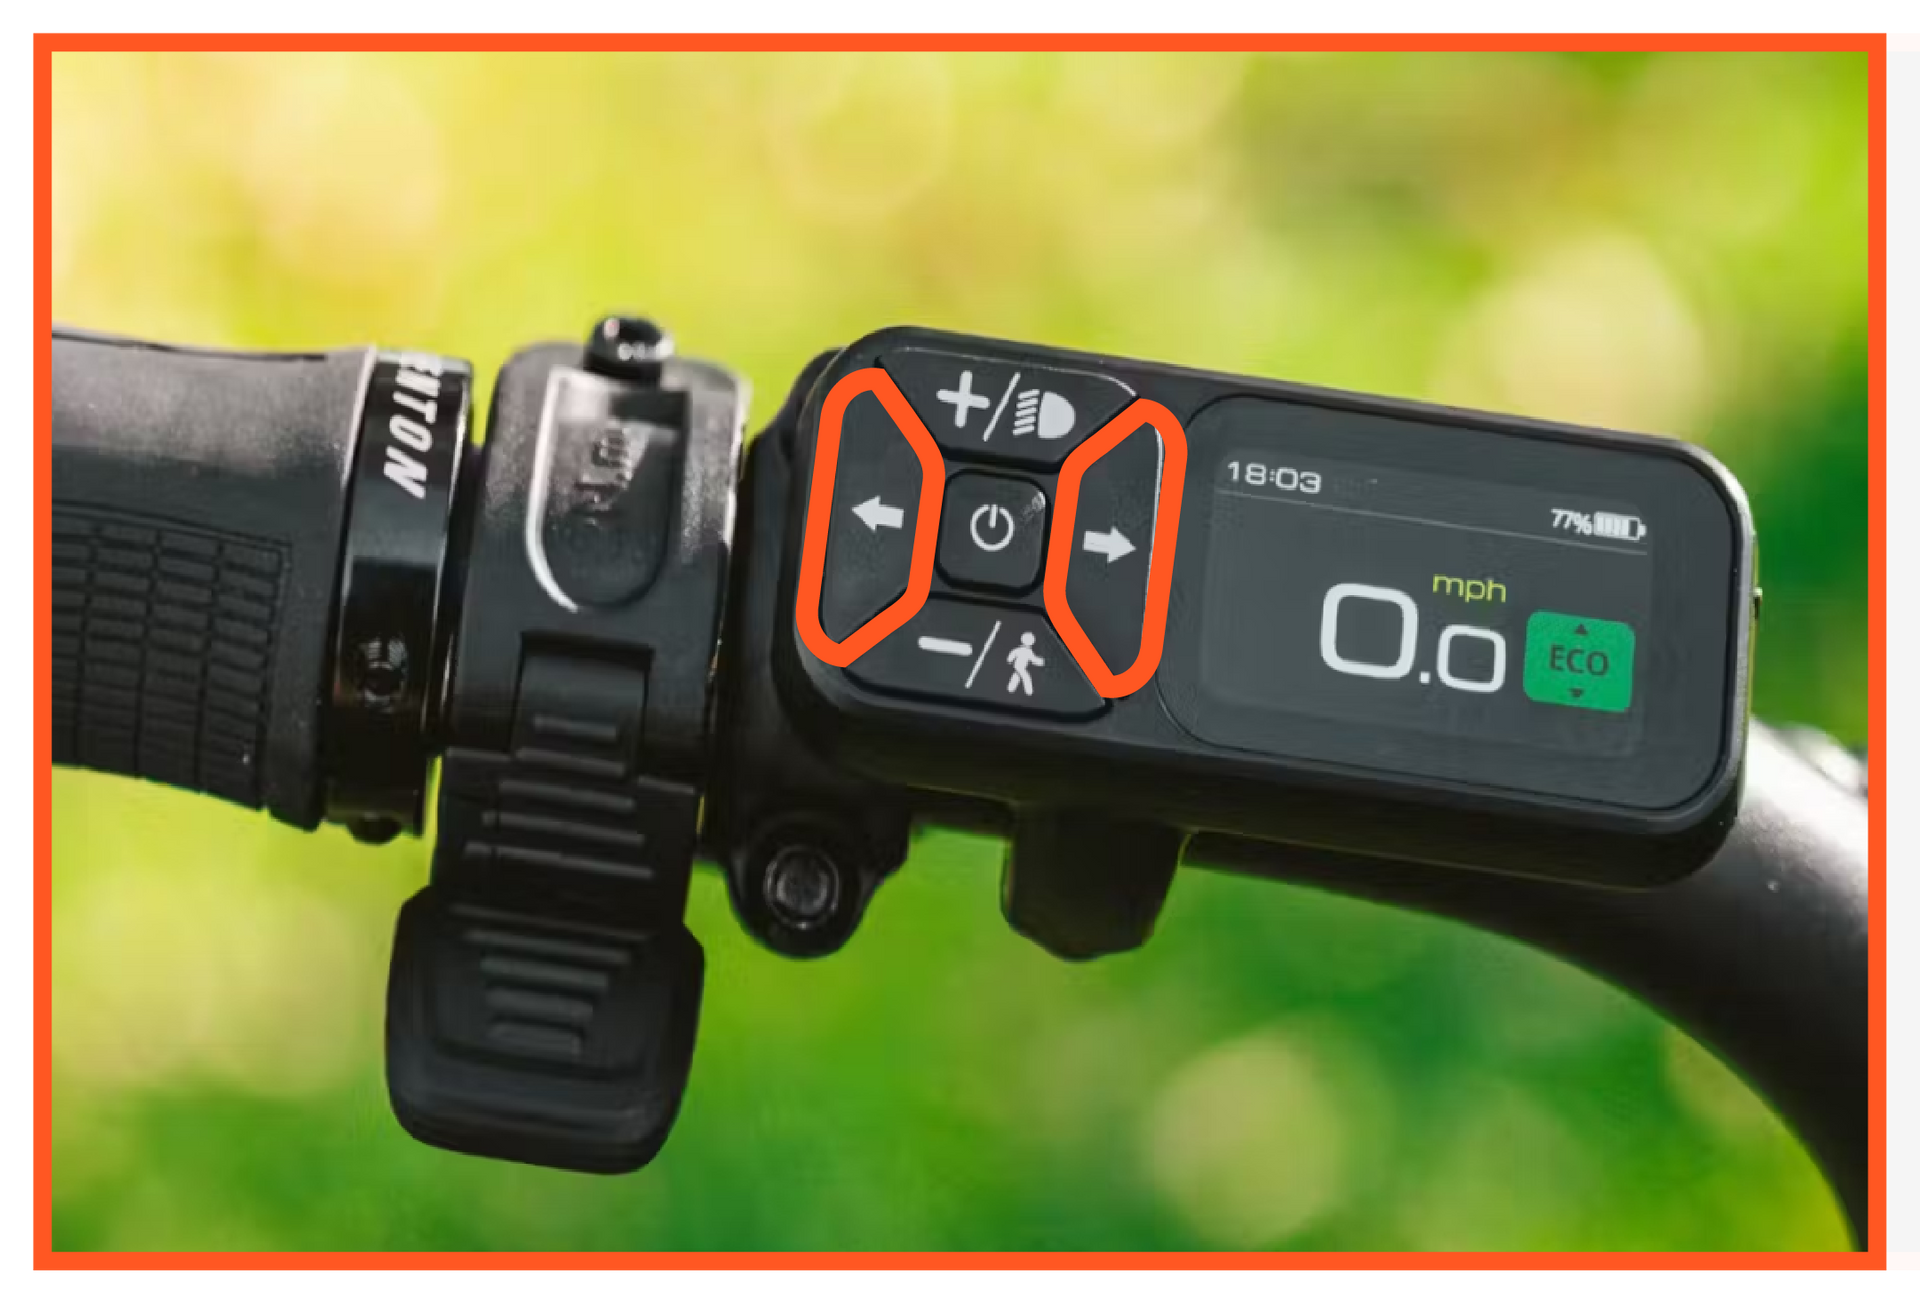
Turn Signals
Push to signal an upcoming turn. The lights will flash to alert others of your direction.
Tip: Always use hand signals in addition to turn signals when possible, especially in high-traffic areas.
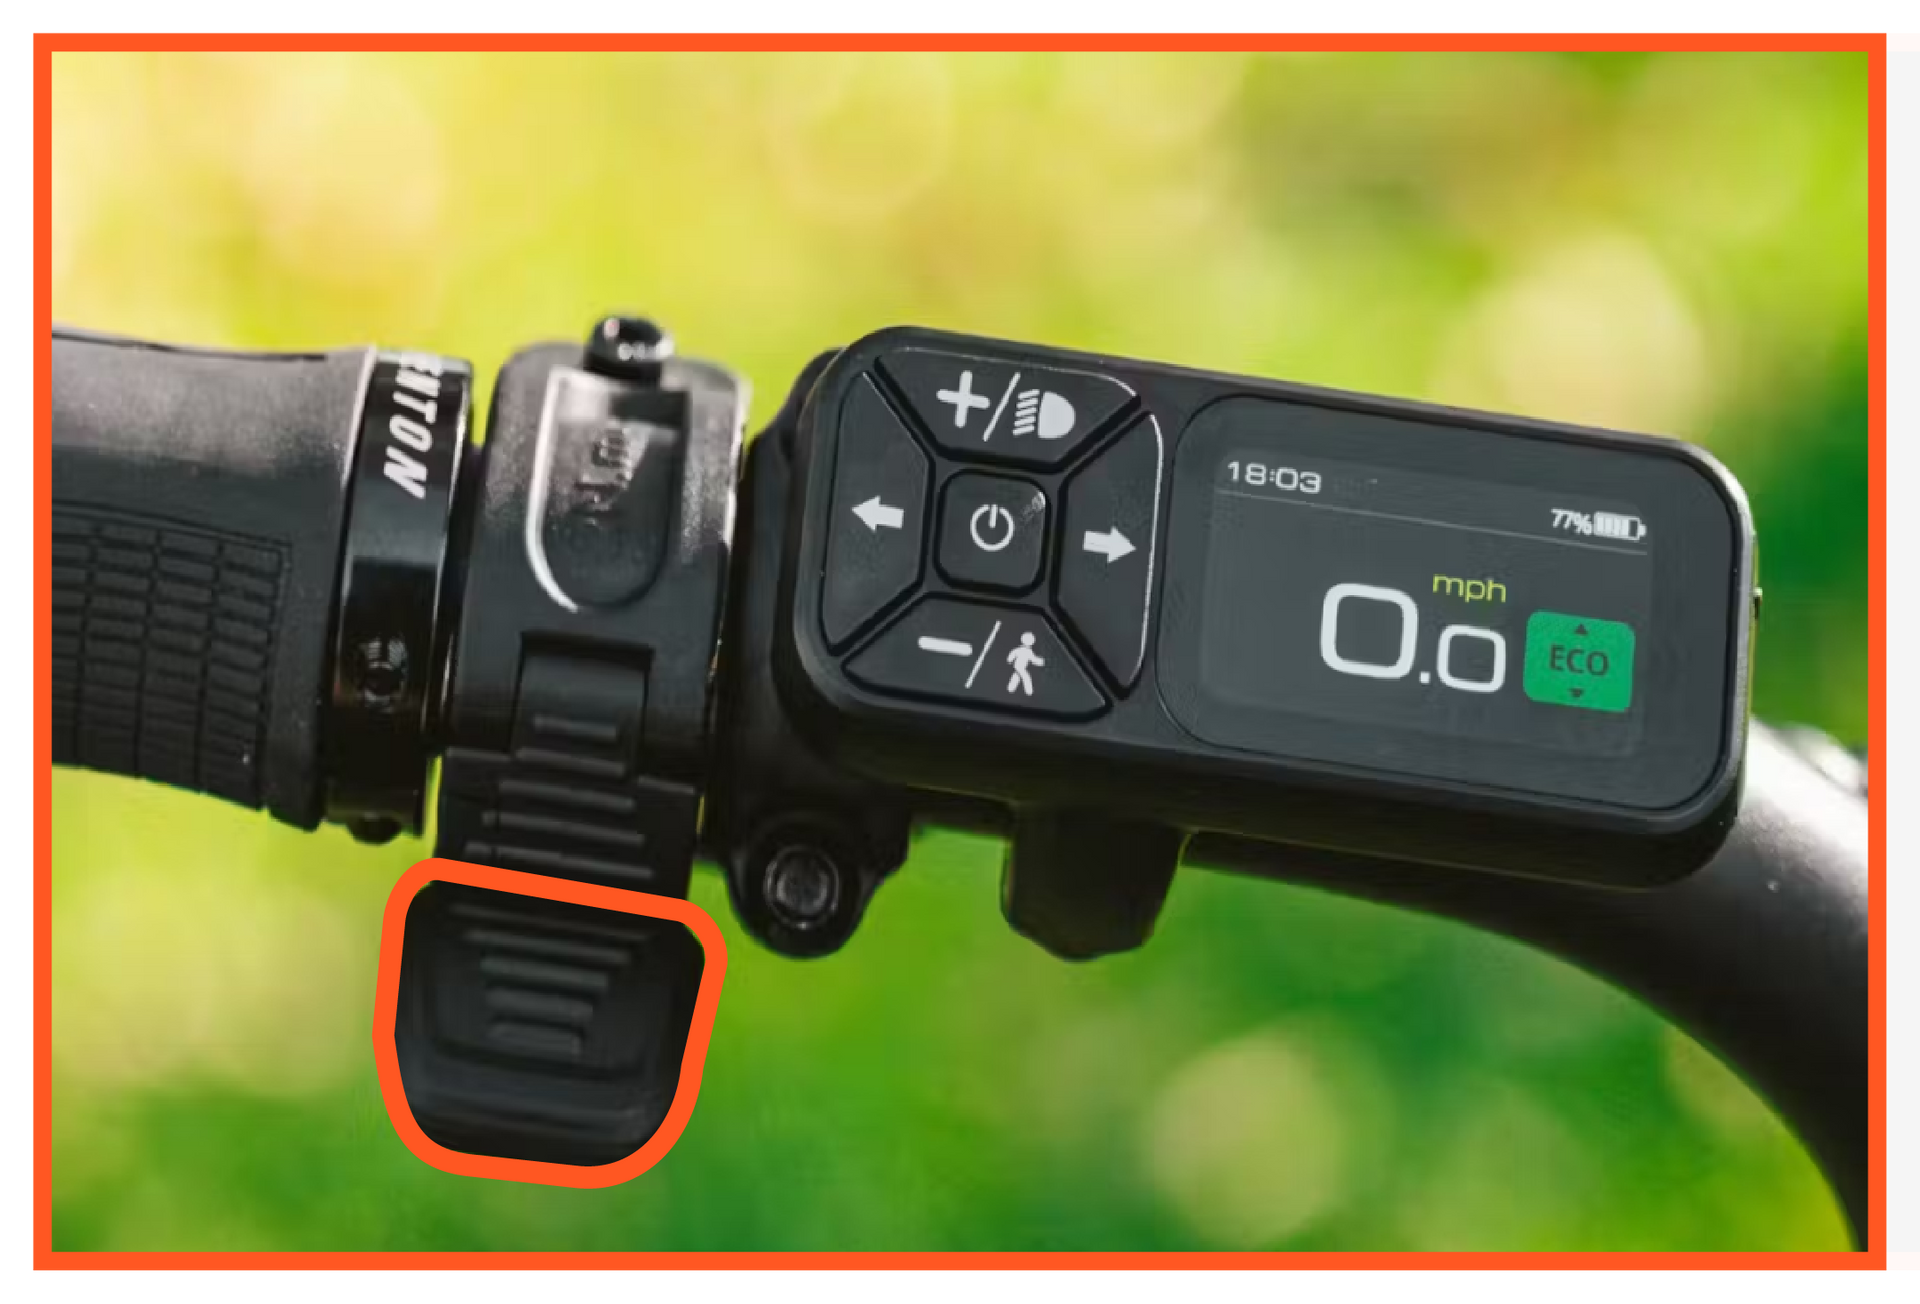
Thumb Throttle
Push to engage motor-assisted acceleration. Using the brakes will disengage throttle.
CAUTION: Extended use of throttle will drain battery much more quickly than pedal-assisted riding.
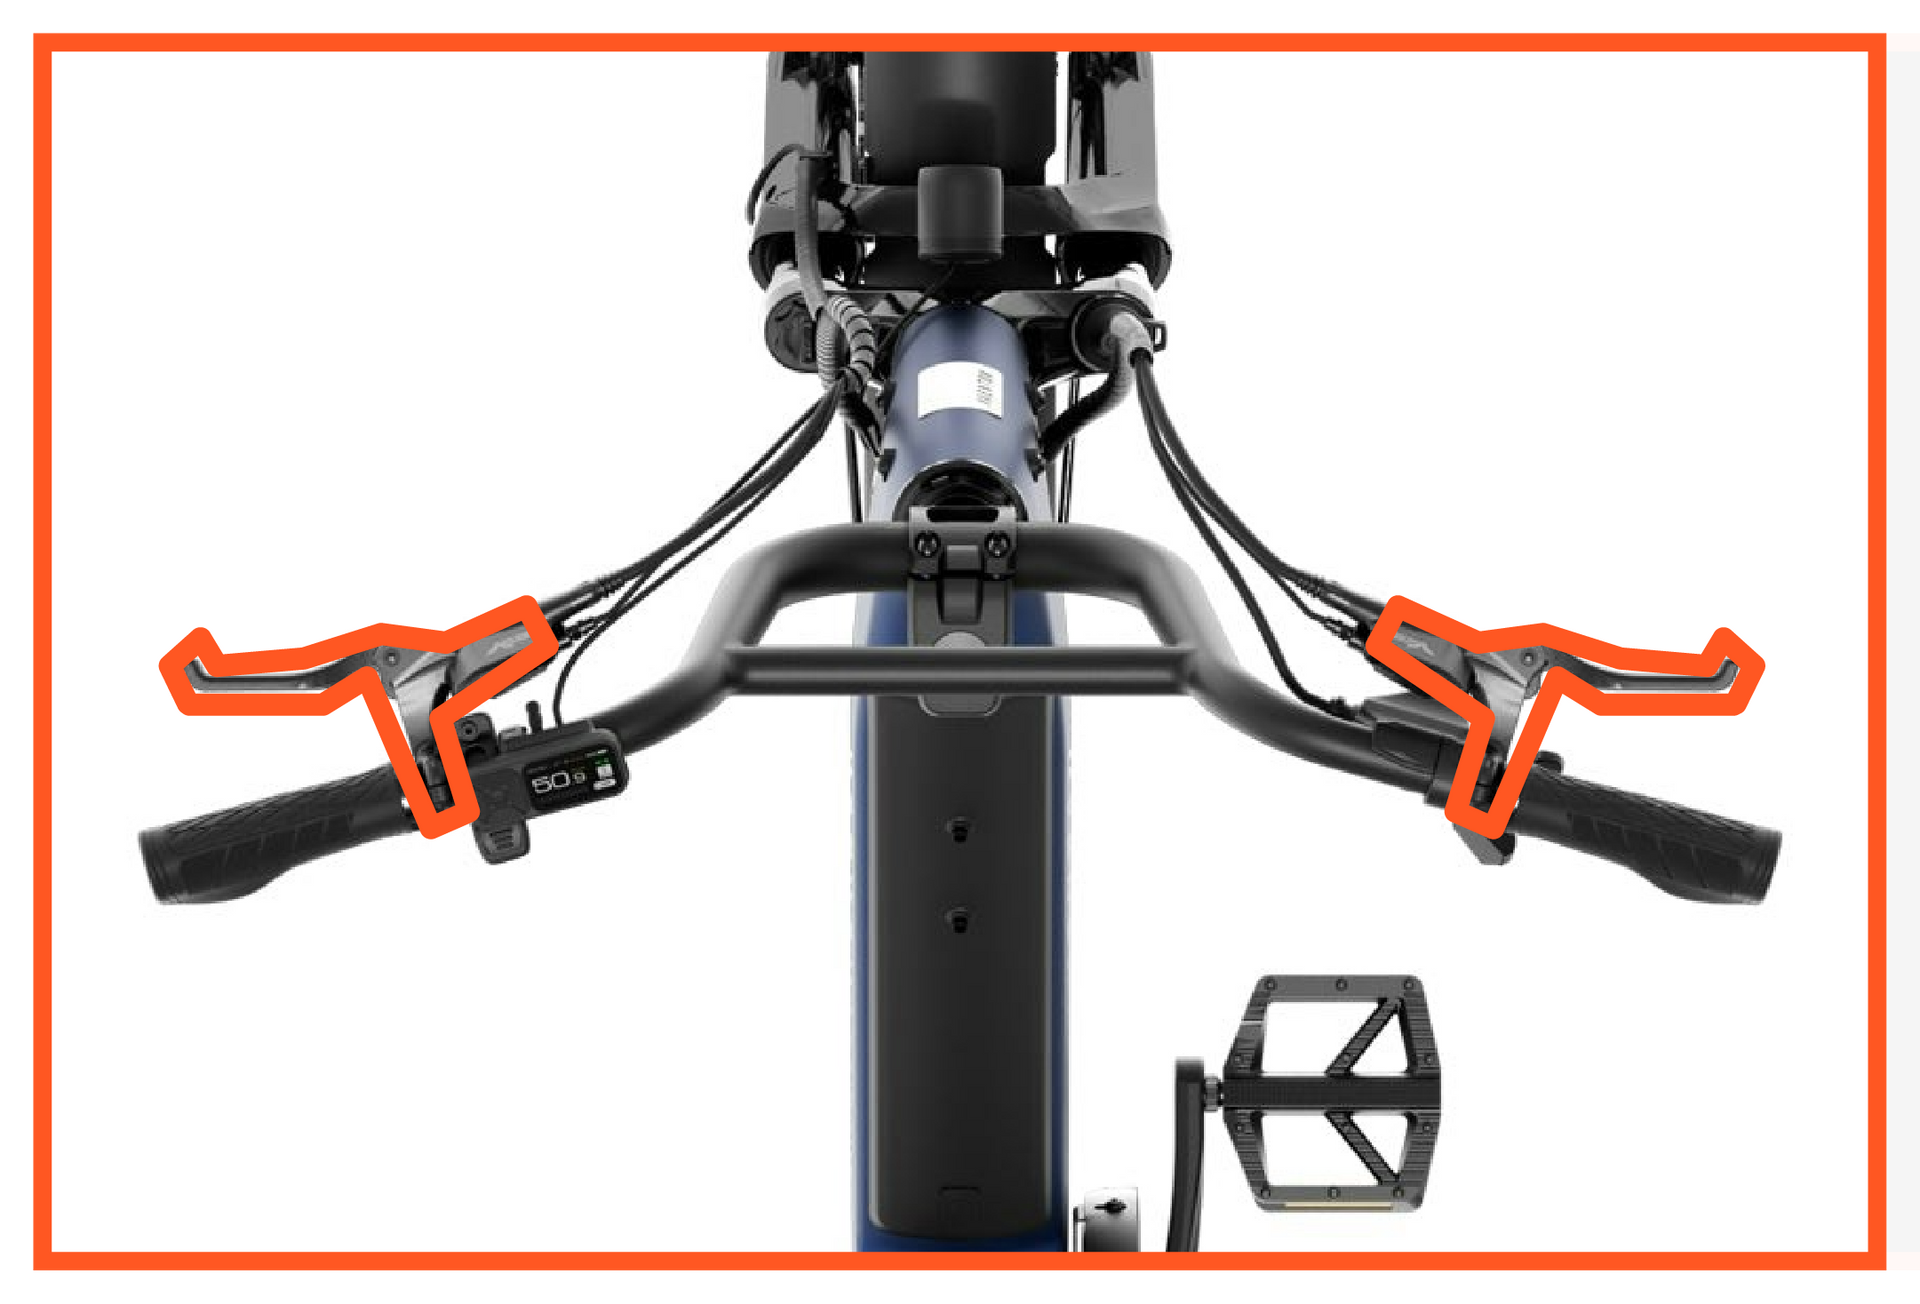
Brakes
Squeeze the brake levers gently to slow down smoothly. Use the right-hand (rear) brake more than the left to maintain control.
Tip: Always squeeze the brakes—Never pull hard!
Simulate the best and safest ebike ride and get a discount!
Shift Up
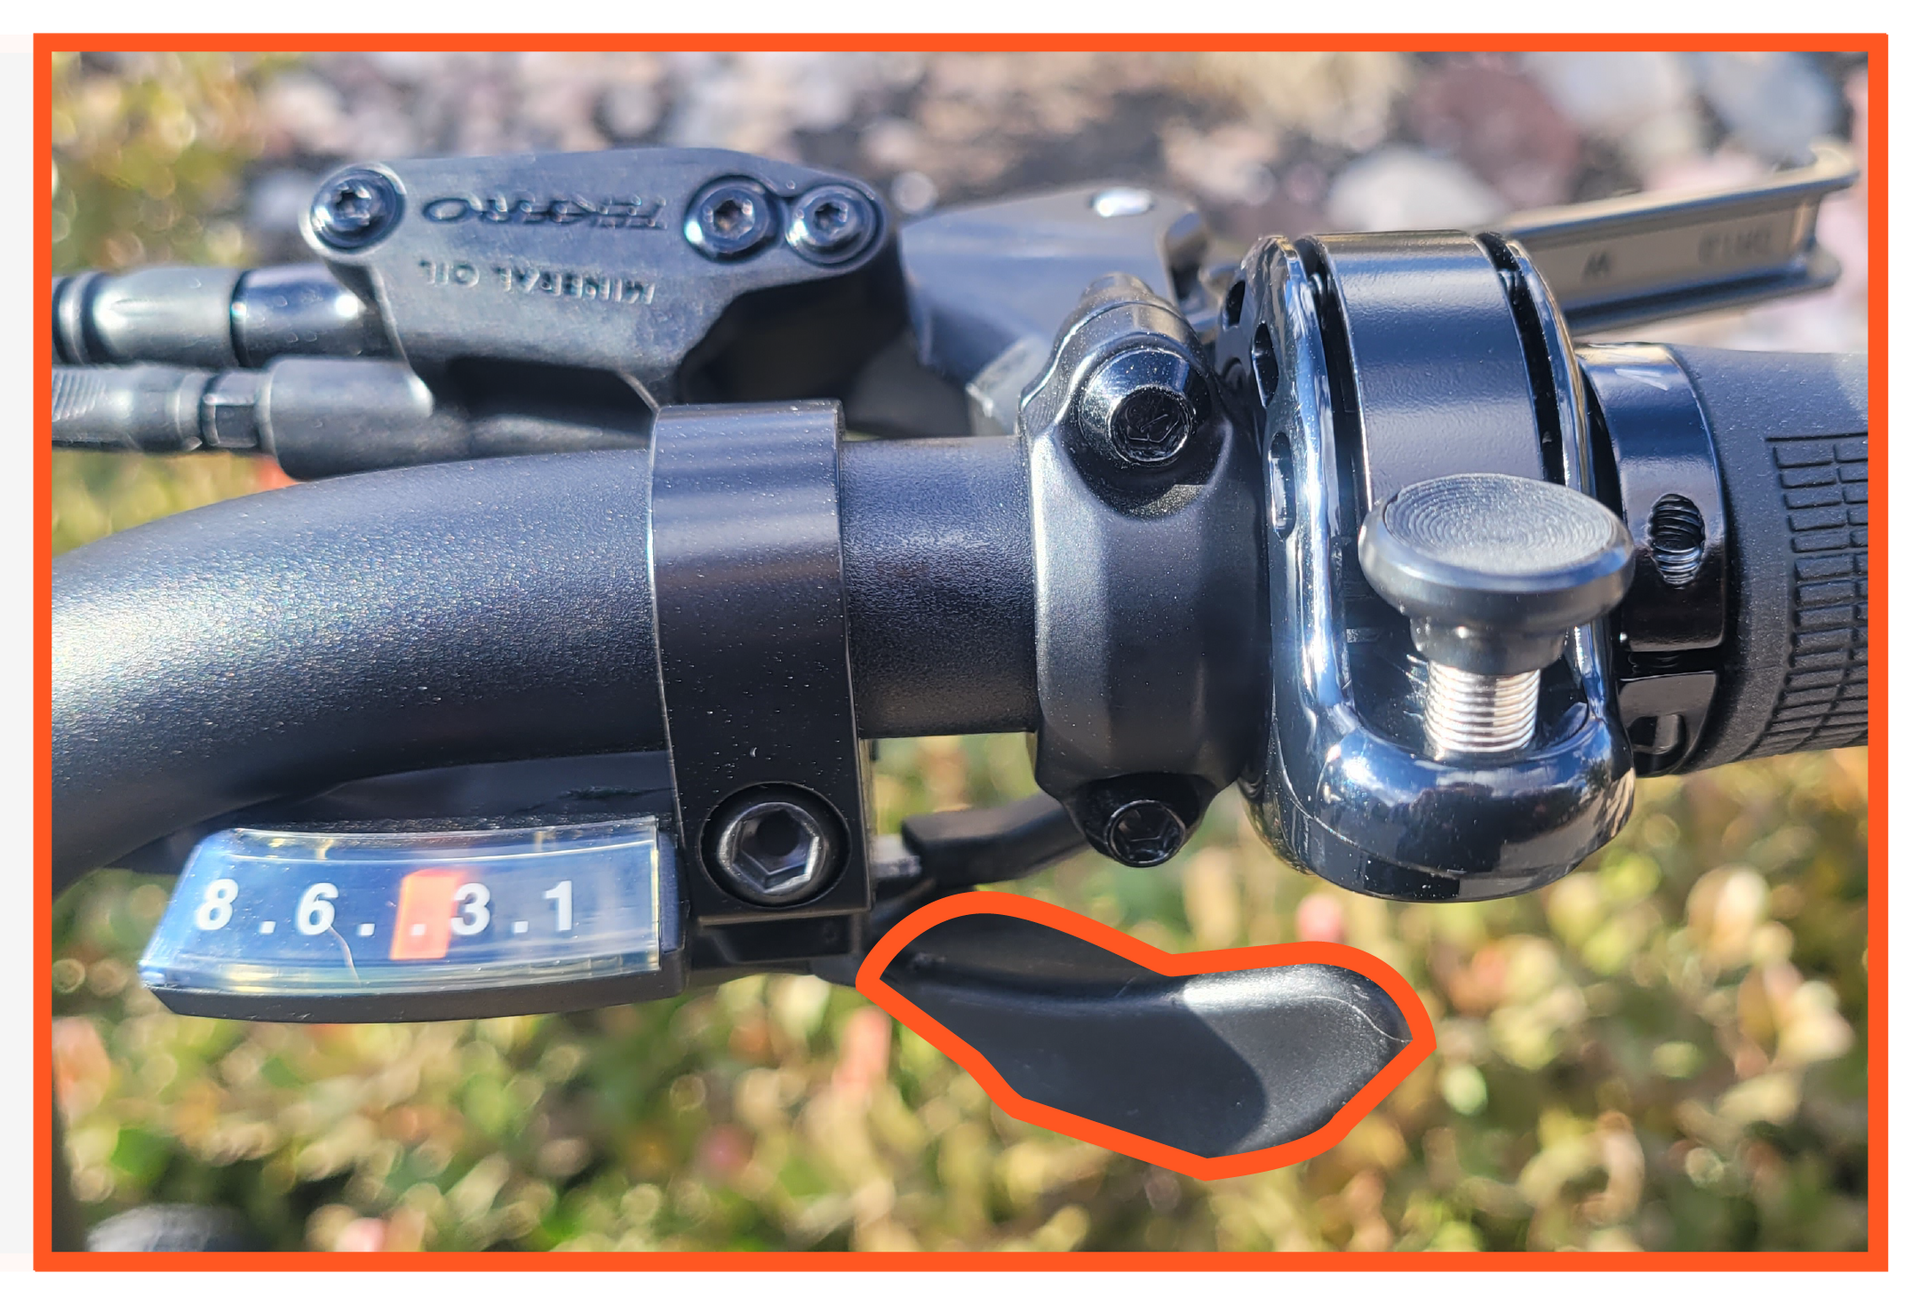
Push forward with your thumb. Use this to go faster on flat terrain or downhill with less resistance.
Tip: Shifting too high on a climb can make pedaling harder. Shift gradually to find the right balance.
Shift Down
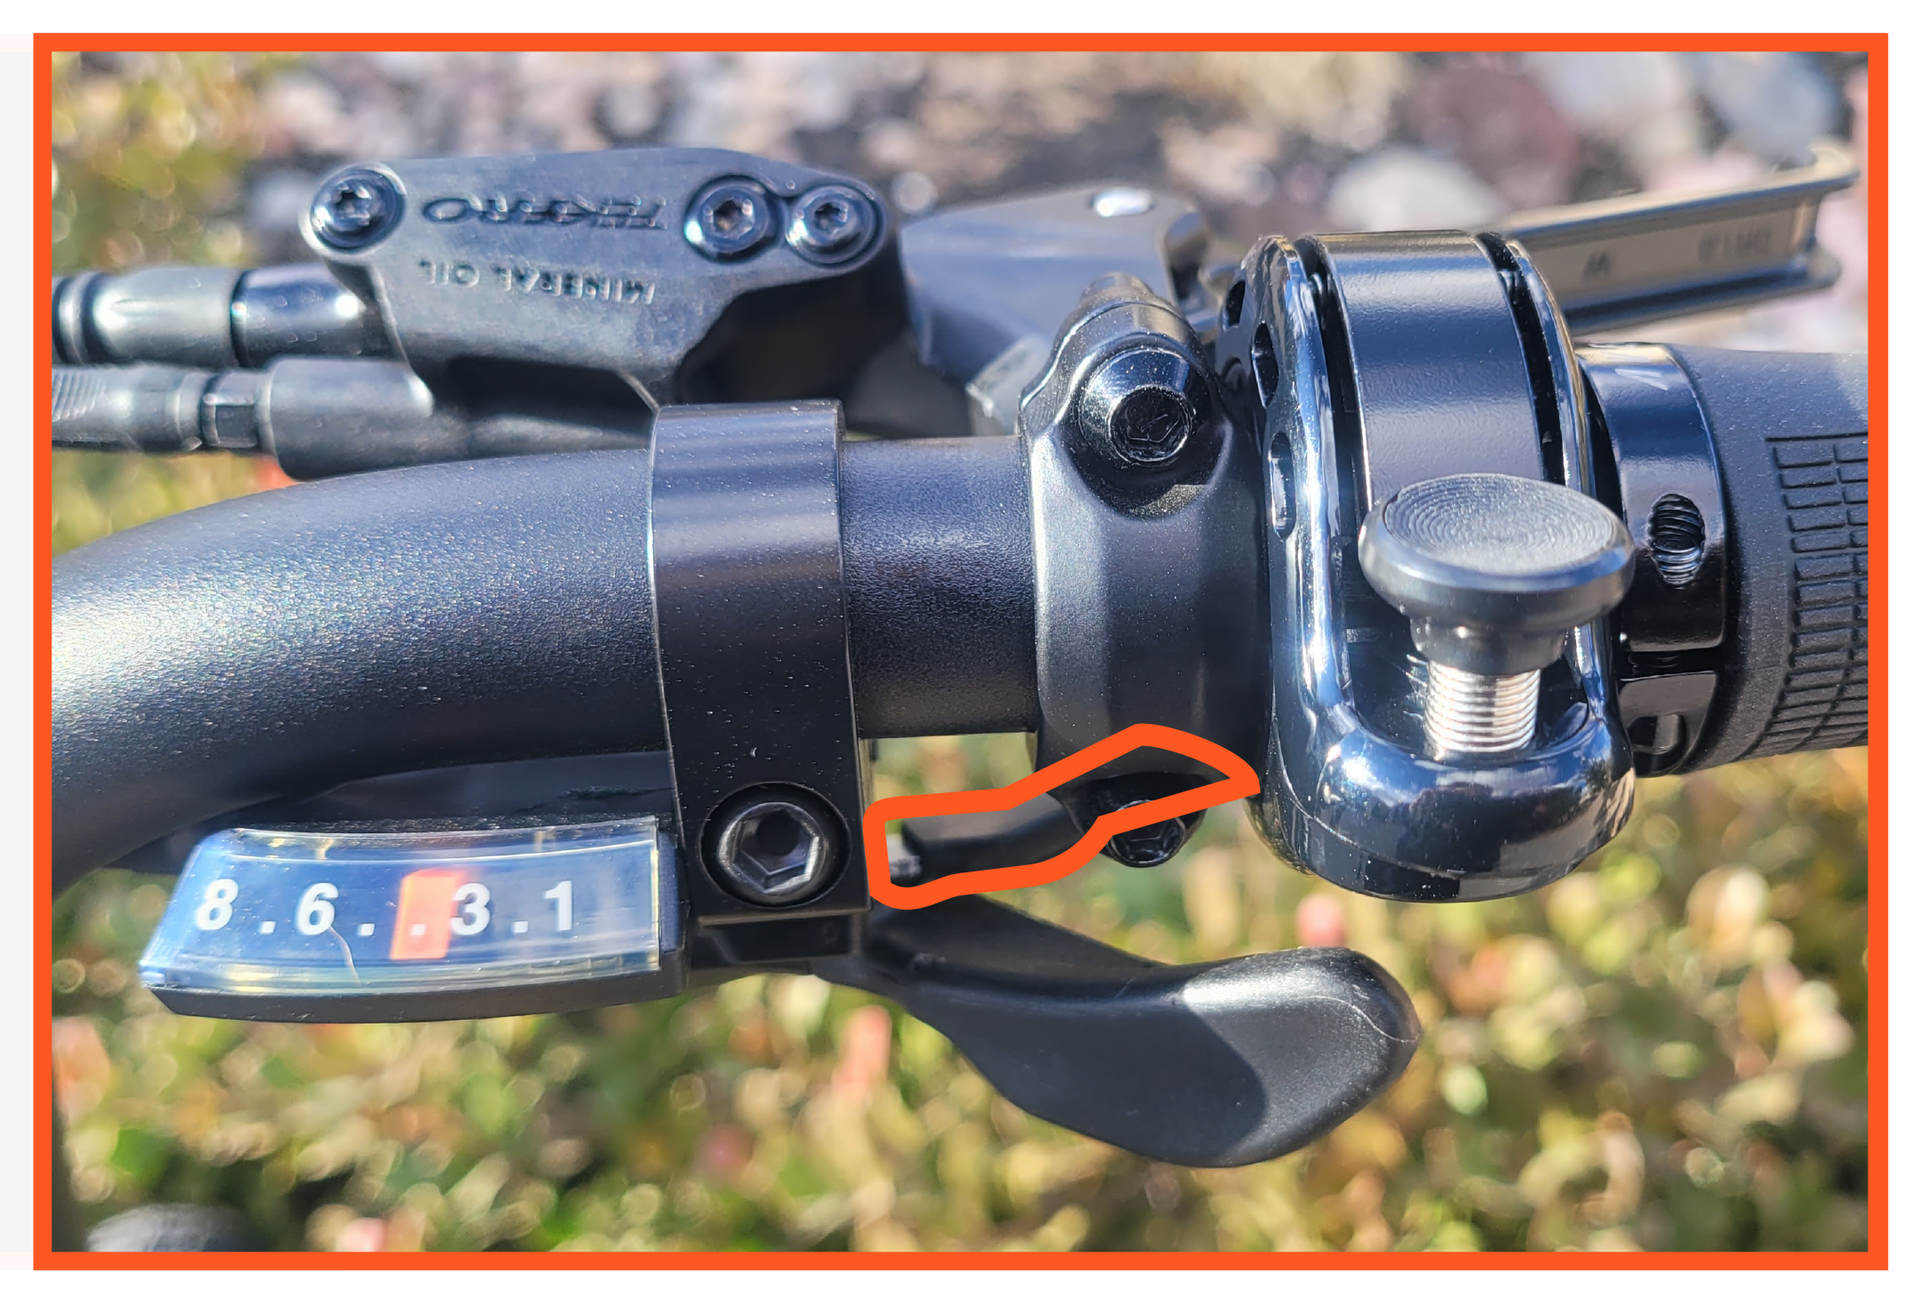
Push toward you with pointer finger. Use this when you need easier pedaling for climbing hills or starting from a stop.
Tip: Anticipate shifts before hills to maintain momentum and avoid strain on you or the motor.
Bell
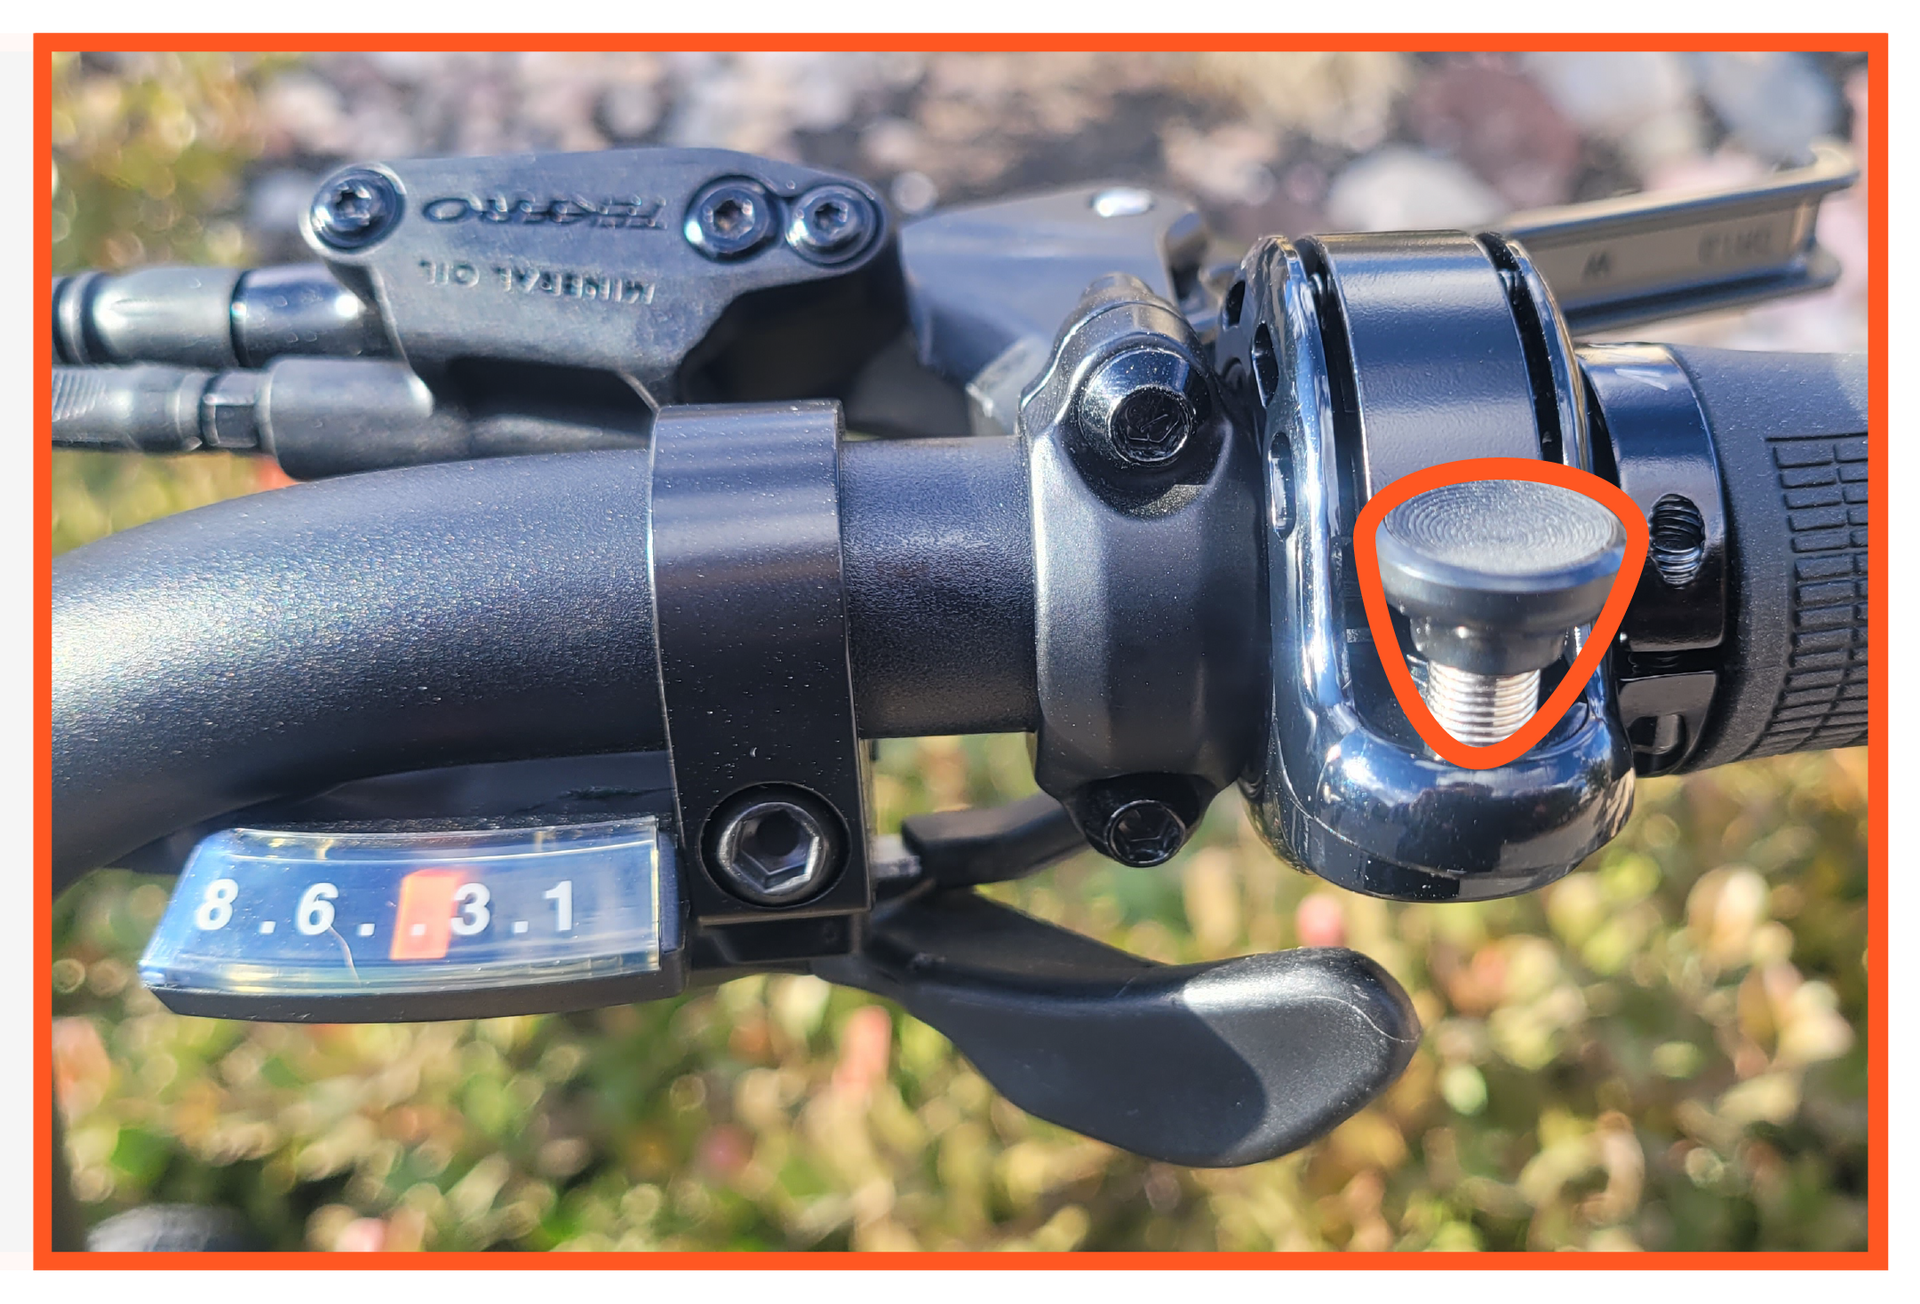
Pull the striker toward you with your thumb and then release. Ring-a-ding-ding.
Tip: Use the bell to alert pedestrians and other riders of your presence. Quick rings help keep everyone safe!
Kickstand
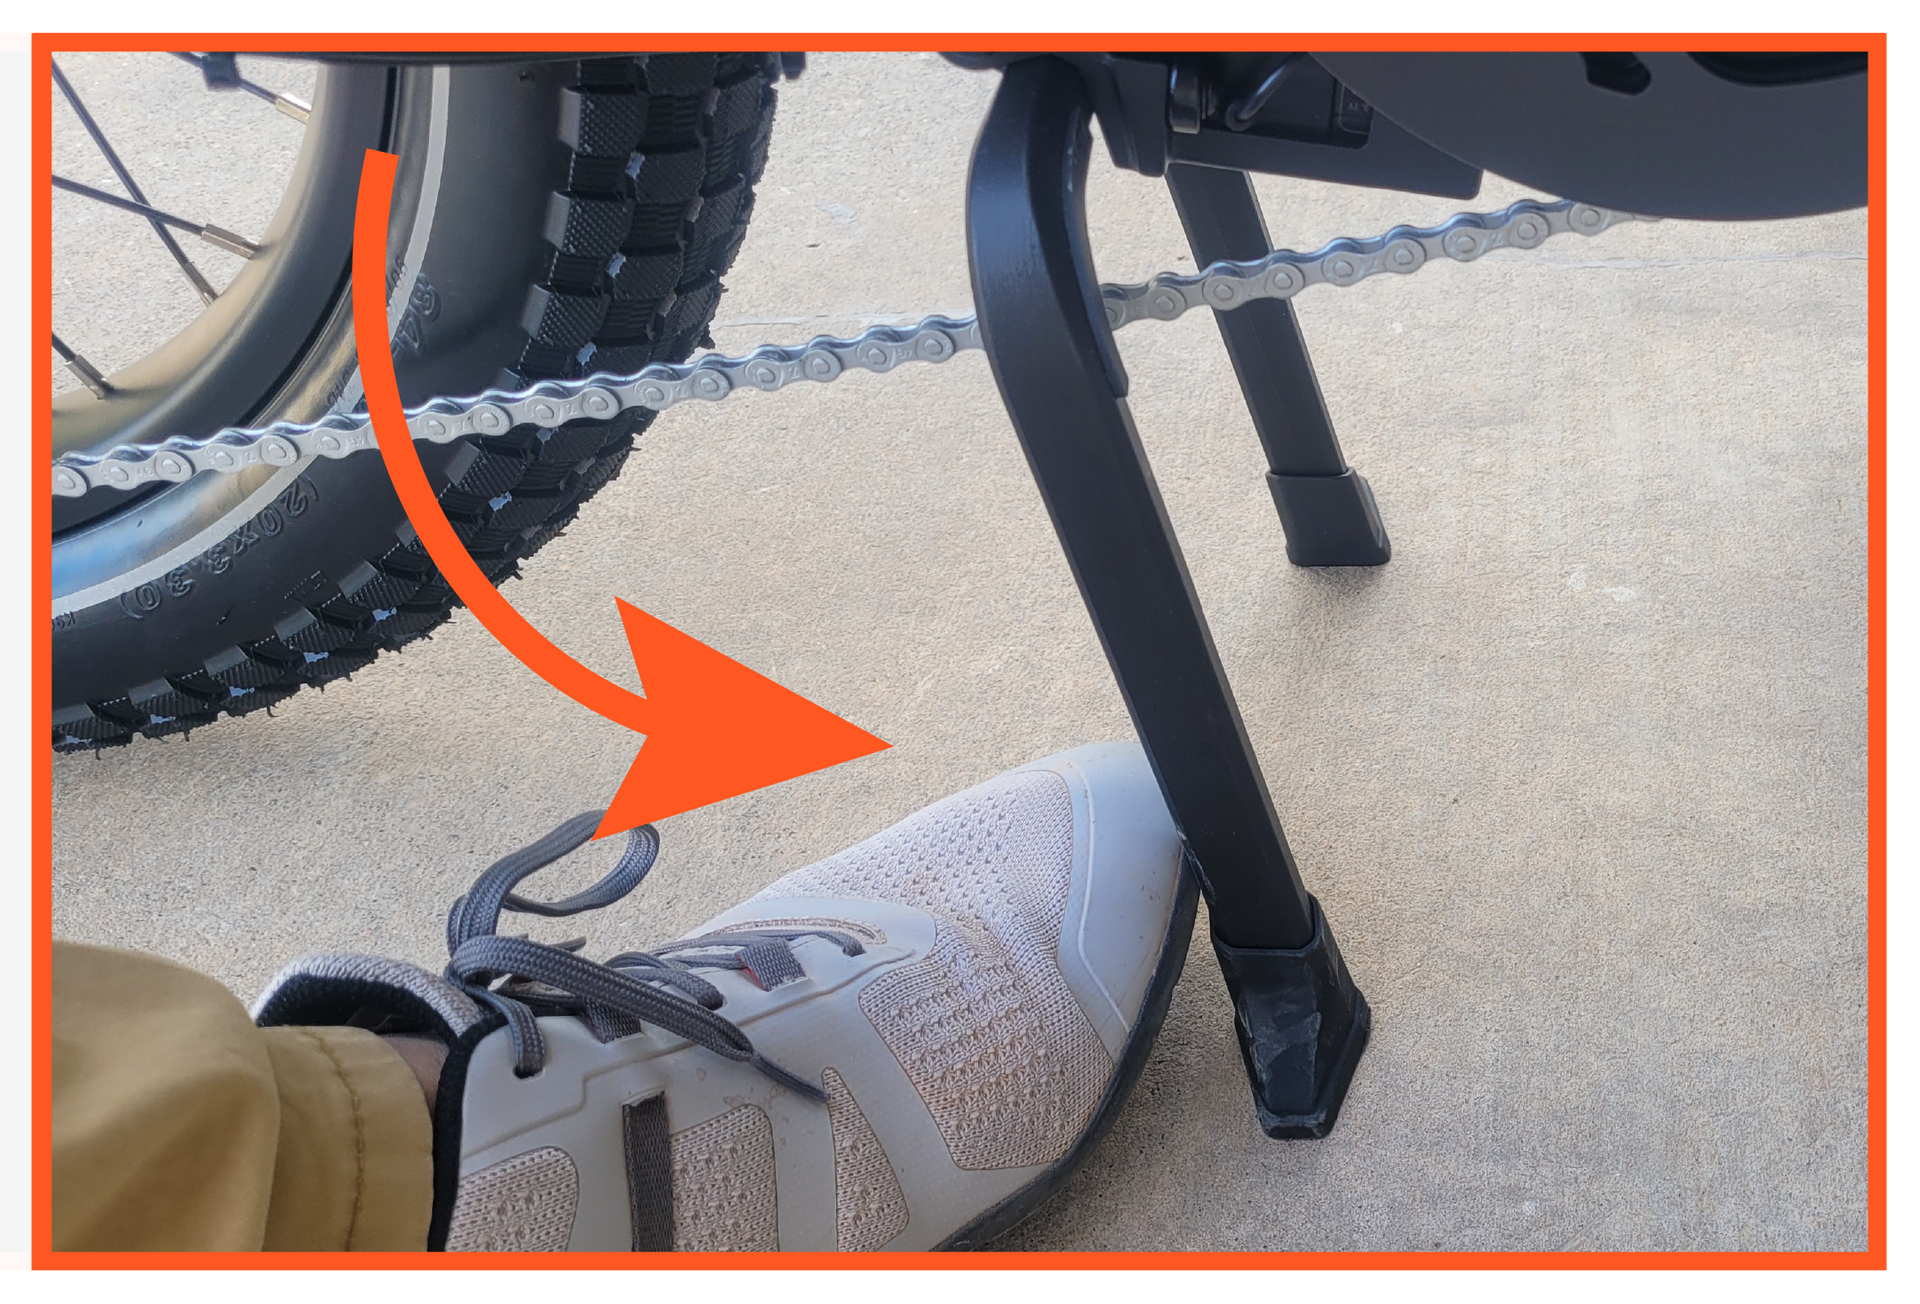
Use your foot to push the kickstand against the ground and pull the bike backward until it locks into place. To release, walk the bike forward until the stand returns to its upward position.
Seatpost
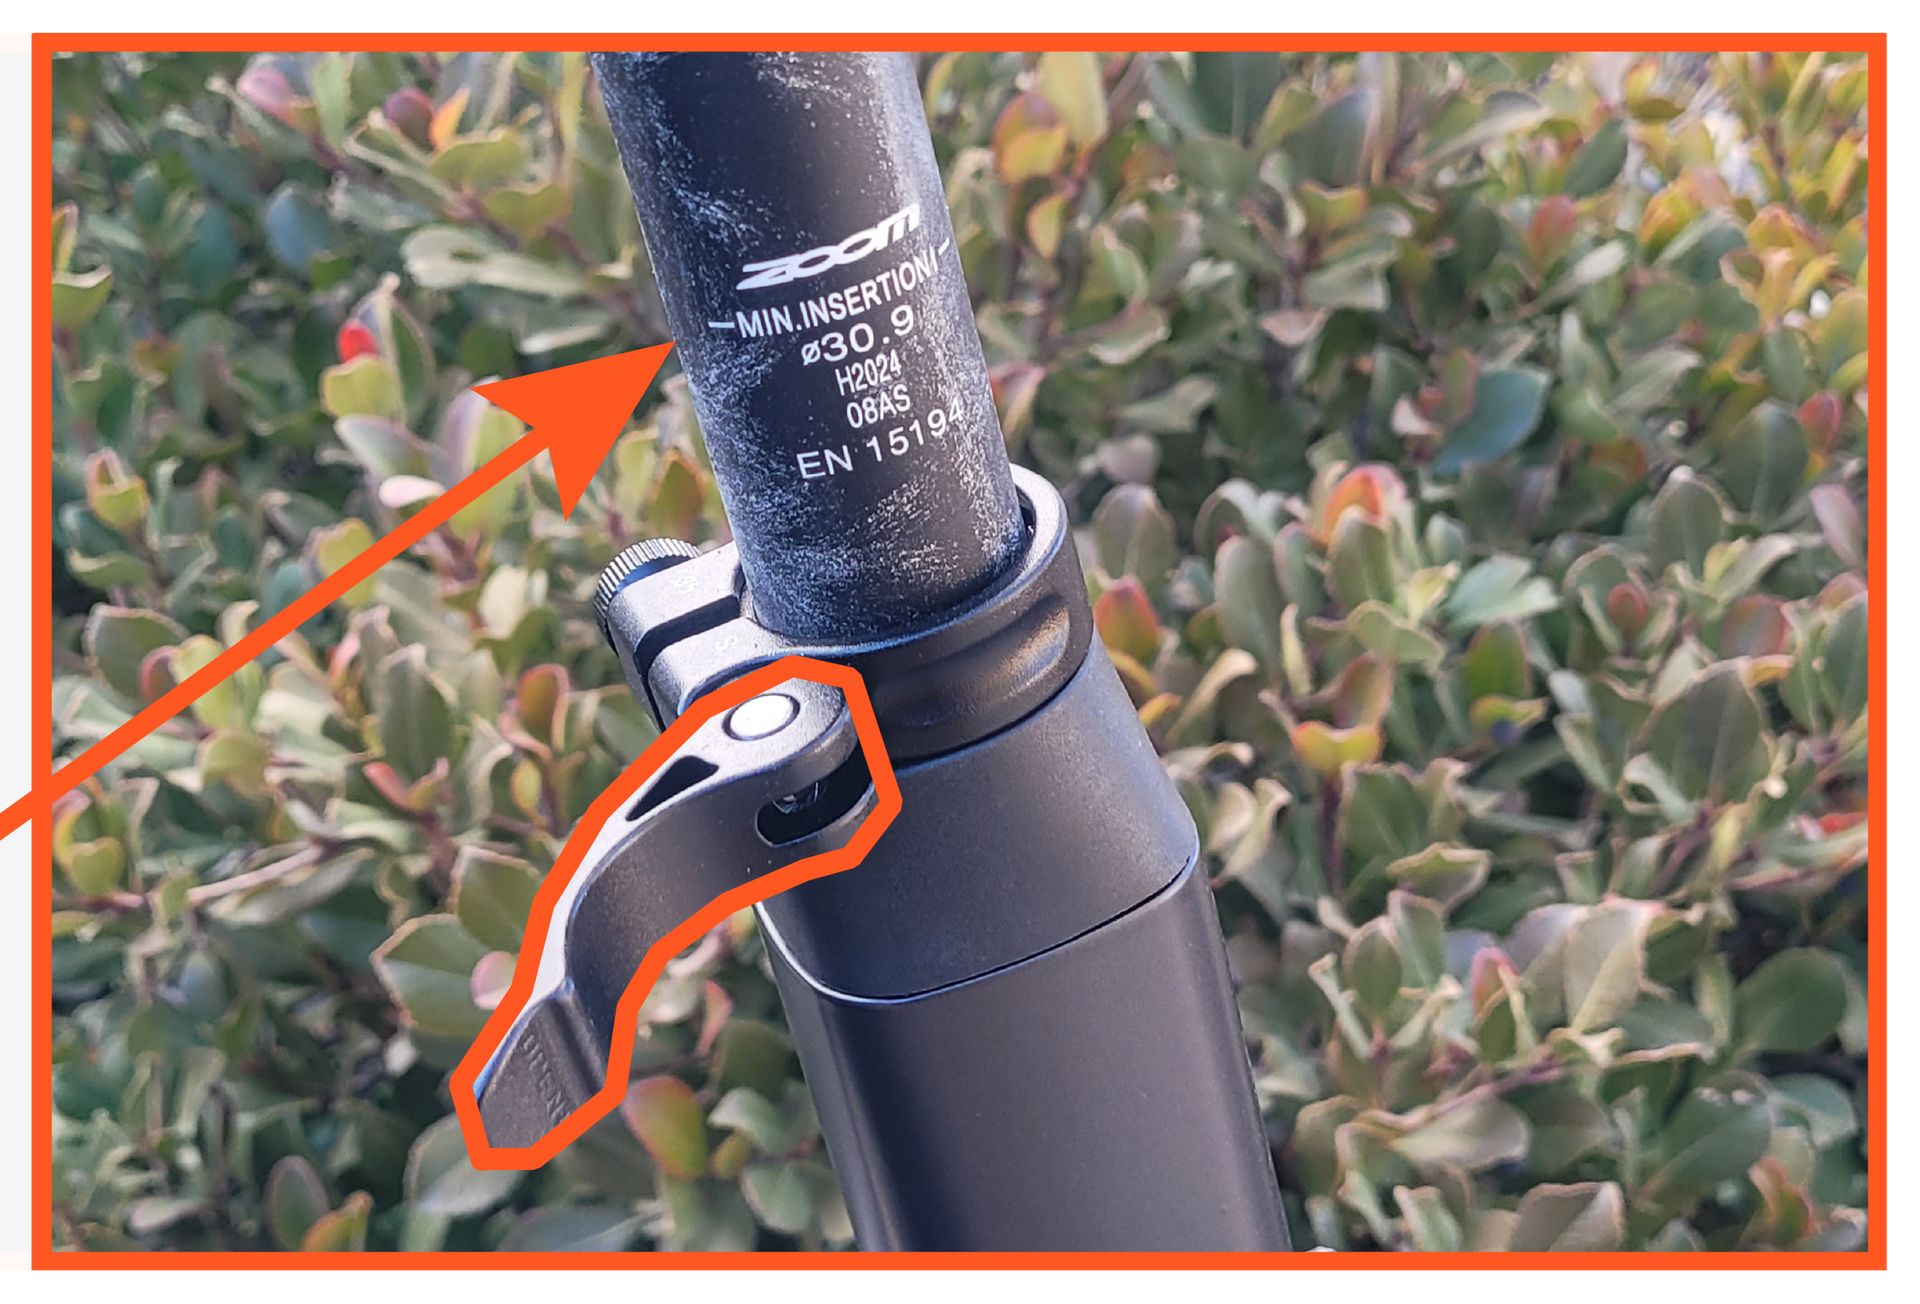
To adjust seat height, pull lever open, then slide seat up or down to desired height.
WARNING: DO NOT EXCEED THE HEIGHT MAXIMUM AS INDICATED ON THE POST.
Now that you're familiar with ebike operations, try out your ebike skills. Beat the high score and get a discount!